
Upgrading to iOS 5 (3 of 4): iOS 5 Upgrade
 On Wednesday, October 12, Apple is officially released iOS5. This is a very significant upgrade, with several fundamental changes to how your iPhone or iPad synchronizes and backs up data. Over the next few days I am going to show you the simple steps involved in upgrading to iOS5 and also provide some details on some of the new features and how to take advantage of them. Check out the new features on Apple.com iOS5 is only supported the iPhone 3GS, iPhone 4, iPad, iPad 2 and iPod Touch (3rd generation).
 Step 3: Upgrading to iOS 5
It's official iOS5 is now officially released to the general public. Hopefully you have been keeping up to date with my previous posts, if not there are links above for backing up your iOS devices and also upgrading iTunes to 10.5. If you are ready to make the leap here we go.
- Once you have confirmed that you are at iTunes 10.5 it is time to download and install iOS5.
- Open up iTunes 10.5
- Connect your iOS device to your computer using the USB cable
- Select the Device in the left panel of iTunes to load the information screen for the device
- Right click on the device and select "Back Up" to create an up to date back up prior to the upgrade
- Click the "Check for Updates" button.
- You will be prompted about a new update being available and should click on the "Download and Install" option
- The upgrade will do the following:
- Download the actual iOS5 upgrade
- Upgrade the firmware on your iOS device
- Synchronize your device
- If you are prompted to set up as a new iPhone or choose from back up just choose the back up you created earlier.
- After the upgrade is complete I recommend hitting the Sync button one more time for good measure. This will create a fresh back should something go wrong.
- Congratulations you have successfully upgraded to iOS 5. More on the new features later.
1. Go back in iTunes and plug in your iOS device.
2. Once it appears in the Sidebar at the left click on it to see the Summary information for it in the right hand window.
3. You should notice a new option to "Sync with this iPhone/iPad over Wi-Fi"

4. Check this check box
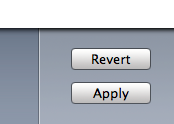
5. Click the "Apply" button in the bottom right hand corner
6. Make sure you see this message at the top confirming that the iPhone/iPad sync is complete and/or that it can be disconnected.

7. Now just unplug the device (don't hit the eject button in the sidebar).
The first time you unlock the new device you are going to be prompted about a few things. One thing it will ask is your Apple ID. Use the same id you use for buying music, this will set it as the default Apple ID for several things. Next it will ask you if you want to set iCloud. I recommend saying no and reading my next post on configuring iCloud and Messages.
You should notice that the device stays in iTunes, even though your device is not connected. Now as long as iTunes is open and your device is on a sync can occur between your devices without being connected. If you want to try it out add a new artist under the Music tab and hit the Sync button in iTunes. You can also trigger a sync from your iOS device by going to Settings > General > iTunes Wi-Fi Sync.

This also means that if iTunes is open on your computer and you plug your iOS device in to charge, it is locked (via it sleeping or you hitting the sleep button) and it is on the same network it will automatically back itself up.
See my post of the Top 10 Minor Features in iOS 5 to get started.