Time to Downgrade
In a post earlier this week,
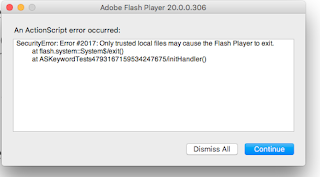
Flash Problems, I talked about an issue I ran into with a recent Flash Player update that caused problems in the application I work on. After tracking down the problematic code I was able to fix it to get around the problem so going forward things should be fine. However, since it is an enterprise application that is installed and maintained by the user I can’t just push a patch out to a web server and move on to the next fire. The bug will only affect users with the latest version of Flash Player, 20.0.0.306, in the past that may not be a big deal because most users wouldn’t install every update that was released, but since Flash has had so many security vulnerabilities it is more likely people will have the latest version.
Google Chrome and Flash Player
In the case of Google Chrome though the user being up to date is almost a certainty, because not only does it ship with its own Flash Player, but there is no way via settings to disable Flash Player updates or switch to a different Flash Player version. Don’t get me wrong I think this is great, users should have the most up to date version with all the latest security vulnerabilities patched. If Flash Player didn’t have so many problems it probably wouldn’t have found itself so tightly constrained. Over the last couple years Chrome has slowly removed support for NPAPI plugins in favor of PPAPI, because the latter sandboxes the plugin and makes it more secure. It had been possible to install an NPAPI Flash Player from Adobe onto a system and then disable the built in Chrome Flash Player for purposes of testing or downgrading, you could even enable and disable the different versions of Flash Player from the plugins settings page. However, with the removal of NPAPI support this is no longer an option, which I found out yesterday. The Adobe instructions for installing an alternate version of Flash Player are outdated and still reference the old way. One thing that has changed over the last year is that Adobe now ships a PPAPI version of Flash Player for Chromium browsers, this was the key to solving my problem. I knew that the developers of Chrome may not want other developers to install an NPAPI Flash Player, but they would definitely allow the installation of an older version of a PPAPI Flash Player. They know we gotta debug issues in old versions of Flash Player somehow. Here are those instructions
Downgrade Steps
Download Installer
First you will need to download the installer for the old version of Flash Player you want to use.
- All previous version of Flash Player can be found at Flash Player Old Versions Download site
- You can find the zip files for the versions in the Flash Player Archives section
- Download the version you want to your desktop
Uninstall Flash Player
In order to downgrade Flash Player you must first uninstall any newer versions.
- Close any web browsers open on your system
- Extract the contents of the zip file.
- In the extracted folder, navigate to the folder that doesn’t have “debug” in the name it will contain all the installers and the uninstaller.
- Double-click the uninstaller that ends with win.exe. You will be prompte to uninstall the current version of Flash Player for all browsers.
- Click Start in the pop up
- When it is complete click Done to dismiss the pop up
Install Flash Player for Google Chrome
After Flash Player has been uninstalled, you will need to install the Pepper (PPAPI) Flash Player.
- Navigate to the folder where you ran the uninstaller
- Run the Pepper installer which is the one that ends with WinPep.exe to install Flash Player for Google Chrome. Flash Player will be installed at the operating system level and will be separate from the version installed with Google Chrome.
- Accept the license agreement
- Click Install to start the installation
- After the installation is done select the Never Check for Updates options and click Done to close the installer
Disable the Chrome Flash Player
Now that you have installed the PPAPI Flash Player into Windows you have to disable the Flash Player that is included in Google Chrome. This is done via a command line argument when launching Google Chrome
- Right click on the icon used to launch Google Chrome
- Select the Properties option to view the properties for the Shortcut
- Go to the Shortcut tab in the properties view
- In the Target field add
–disable-bundled-ppapi-flash after the closing double quote that wraps the path to chrome.exe. The new value for the target field should be something like this “C:\Program Files (x86)\Google\Chrome\Application\chrome.exe” -disable-bundled-ppapi-flash - Click OK to save the changes
Verify Installed version
Repeat the initial instructions to verify that the version of Flash Player is now correct in your browser
- Open up Google Chrome using the shortcut
- Go to chrome://plugins
- Expand the Details link at the top right corner to see the details of all the plugins
- Look at the Flash Player version it should now have a location that points to the Windows Flash Player rather than a Flash Player inside the Google Chrome installation directory.

