An iOS Laptop

The one device I would like Apple to release in 2018 is a laptop that runs iOS. I have been thinking about this a lot since reading Jason Snell’s piece at MacWorld, Why Apples Next Laptop Should Run iOS and the related discussion on Upgrade #168: Hail Hydrant. The addition of the Files app and better multi tasking in iOS 11 has made the iPad an even better alternative for those looking to get rid of their Windows or Mac laptop. However, I haven’t seen a lot of people switching out there laptops for an iPad, but instead moving towards Windows or Chrome OS convertible devices. I think the tablet form factor of the iPad combined with some out of date understanding of the capabilities of iOS coupled with the adoption of Chromebooks in schools is keeping people from making the switch.

It seems strange, but I think one of the big things keeping the iPad out of the conversation is the tablet form factor. If a person is looking to replace their old laptop or desktop they look at the iPad and it just does not seem like a replacement because it is perceived as just a tablet. They may see the Smart Keyboard attached to it in the store, but that is just an accessory for a tablet. People seem to have an association with the first class keyboard and a “main” computing device. The laptop form factor provides an extra level of comfort and consistency users may not feel with a tablet. The Smart Keyboard is also limited to being used on hard surfaces, which might also turn some people off.

The next thing holding back the iPad as a person’s main computer is the misconception that you can’t do a lot of “computer” things on them. It is probably just a hold over from the early days of the iPad when it was the next big thing and not only was the operating system pretty limited, but the quality of apps in the app store was also very low. Most people held on to their iPad 1 or iPad 2 for several years and never got to experience the more powerful iPads of the last few years or the new crop of apps that pushed the limits of tablet computing. If it was not for the last two years of daily iPad use and hours of podcasts helping me retrain my brain to work with a different style OS, I might also disregard the iPad Pro too.

Chromebook adoption in school’s could also be a factor as children start to get their own devices at home. My son has been using Chromebooks in school for a couple years now and has become very proficient navigating Chrome OS. Last fall, his homework required a device at home and he asked for a Chromebook. After a little research I found that while the low end Chromebooks are cheap; in order to get something with a little more longevity and higher quality you have to spend quite a bit of money. I briefly considered getting a MacBook for him, but then realized if anybody could make an iPad work for his tasks it was my son. I explained to him how his iPad Air could do all of the things the Chromebook could do and more. Of course the lack of a keyboard was an issue so I bought the Element Digital bluetooth keyboard case and despite the smaller keys he is quite happy with his setup. Unfortunately I think we are the exceptional case and most parents would purchase a $200 Chromebook and call it a day instead of spending twice as much for an iPad and a keyboard.

The combination of iOS and the iPad is now mature enough to be used by most people as their non-smartphone device. The first step Apple should take is to create an iOS device with a more familiar laptop form factor for iOS. The device would still support touch for some activities, but the keyboard would be the main input device. It would require a little more polish to keyboard shortcut on iOS, but for the most part it should be compatible out of the box. The next part is a bit trickier and involves Apple getting the word out that iOS on iPad can now do much more than it could back in the iOS 5 days when they owned their first iPad. Finally the new lower price point for the regular iPad should help make the iOS on iPad experience much more affordable when compared to other devices and the iPad Pro. I am convinced that iOS is the future of Apple devices and now is the time to start to expand beyond the old tablet form factor and into more interesting form factors like a 13” laptop or maybe even something as boundary pushing as a 21” desktop machine.


iPad Pro Productivity Apps

Since buying an iPad Pro way back in 2015 I have come to rely on a few different apps for my day to day use at work and for my creative endeavors at home.

My Current Home Screen

Note Taking

I played around with a few note taking apps in the beginning, but settled on Good Notes 4 for a few different reasons.  First and foremost it has great Apple Pencil support and includes a neat feature that lets you lasso text and move it around, which is helpful if your writing style is a little messy and sparse.  My favorite feature is that you can import PDF files from a number of file providers like OneDrive, Google Drive, DropBox or in iOS 11 the Files app.  Once imported you can mark the documents up and then export them back to any provider you want.  The app has the concept of categories to keep you organized and has the concept of notebooks with all different types of paper to choose from.

Automation

iOS apps have always been sandboxed since day one and this limits the interactions you can do between apps.  In iOS 8 the concept of app extensions was introduced which let developers create extensions allowing one app to open content in a different app.  The Workflows app, which Apple bought within the last year, lets you do lots of different tasks across multiple apps.  You create a workflow and then using a building block interface construct a workflow that can get a distance from the Maps app and plug it into a prebuild text message for sending.  You can add data to the health kit app or do more complex things using web services.

FTP and SSH

Managing my web server from the iPad is done easily using Coda.  The app includes the ability to configure multiple FTP servers, with great text editing tools and an SSH client when you need to update something remotely.  The text editor supports lots of different syntax formats, which is useful when editing on your mobile device.

File Providers

I have my files spread across multiple file providers like DropBox, Google Drive, OneDrive and iCloud Drive. Once you install any of these apps the built in Files app will gain access to the files and you can quickly access them from any apps that properly integrate with Files.  

Miscellaneous Apps

Here are some other apps I use on a regular basis:
  • Ferrite - Podcast recording studio
  • Overcast - Podcast listening app
  • Microsoft Remote Desktop - Sometimes you need to access your Windows machine
  • Byword - Markdown editor
  • PCalc - A calculator because the iPad doesn’t come with one, plus this developer has lots of easter eggs in it.
  • iMovie - Movie editor because my Macs are too old to edit 4K
  • Tweetbot 4 - My favorite Twitter client
  • Inbox by Gmail - Keeping the dream of inbox zero alive.

Getting Video into iMovie on the iPad without iCloud

A few months ago I wrote a post, My Kingdom for a Local iPad Data Store, talking about how I wanted to be able to use iMovie on the iPad to edit my drone videos. The problem was that in order to get the videos into iMovie they had to be in iCloud Photo Library or in iCloud Drive, but I didn’t want them to be uploaded and then maybe downloaded from the cloud because they are large files. Over the weekend I had an epiphany and figured out how to work around this by doing some offline file shuffling.

  1. Turn on Airplane mode to prevent any internet connection from occurring.
  2. Connect a Lightning to USB adapter with an attached SD card reader to the iPad. 
  3. Insert and SD card into the card reader or in my case a Micro SD card. 
  4. The Photos app will launch and prompt you to do an import. 
  5. Import any of the videos you want and then choose to keep or delete them on the card. 
  6. Unplug the Lightning to USB adapter. 
  7. In the Photos app go to the “Last Import” album. 
  8. Tap the Select button to enable selection mode and select all of the videos. 
  9. Tap on the “Share” button (the box with the arrow coming out of it). 
  10. In iOS 11 tap on the “Save to Files” action and in iOS 10 select the “Upload to iCloud Drive” action. This will copy the file to iCloud Drive. 
  11. In the Photos app tap the Select button again and select all the videos and this time delete them. 
  12. Go to the “Recently Deleted” album and delete all the videos from Photos (just in case these would get uploaded to iCloud Photo Library).
  13. Now open up iMovie. 
  14. Create a new movie and import all of your videos from iCloud Drive. 
  15. Click Done to go to the Summary screen just to make sure everything is “Saved”.
  16. If you are using iOS 11 open up the Files app and if you are using iOS 10 open up iCloud Drive. 
  17. Delete all of the videos from iCloud Drive. 
  18. Go to the Recently Deleted view and also delete them from there. 
  19. Finally open the Settings app. 
  20. Go into the settings for the current user, which should be the top option. 
  21. In the user menu select iCloud. 
  22. In the iCloud menu you can choose which apps will save their data to iCloud. 
  23. Turn this off for the iMovie app. 
  24. Now turn off Airplane mode and you are ready to work on your movie. 
The iCloud Drive/Files storage part seems a bit excessive, but was necessary because any videos imported to iMovie from the iCloud Photo Library stop working if you delete them.  Importing from iCloud Drive/Files on the other hand puts a copy in the iMovie app’s local storage.

Intro to Smart Home Stuff

Last month I spent a few days at my dad’s house in Florida and was surprised by how much home automation he had in place. The front door would automatically lock after a couple minutes, the lights were on timers and the garage lights had motion sensors. I immediately felt like I was falling behind in the technology race with my own father. The good news for me was that most of his devices were programmable, but they couldn’t be controlled from another device like a phone or one of the “ladies in a cannister”. I knew once I got home it was time to start planning my first foray into the world of the “smart” home.

Since I am an Apple devotee I started by researching Apple HomeKit. It seems that support for HomeKit from various vendors has been very slow due to the hoops they have to jump through in order to get approved by Apple. On the surface this seems problematic, but I like to think the adoption is a bit slower because they have placed higher standards on the vendors to ensure a more secure smart home experience.

I also looked into Alexa because I knew it supported many more devices, but my impression was that there wasn’t a consistent platform for connecting devices. In some cases you have to use the Echo skills functionality for the specific device, and in other cases you have to leverage IFTTT to trigger devices. Apple on the other hand has created an additional layer on top of the individual device apps that helps give a consistent way of controlling all the different devices. Siri support helps provide a little more flexibility than you get with Alexa, as is outlined in this great article from CNET, Google Home vs Amazon Echo. It also seemed a safe bet was to get stuff that supported Apple HomeKit, because they would also support all the other platforms too.

Once I settled on HomeKit it was time to find a device to try out in my home. I started thinking about my daily routine and what parts of it would be made easier and bedtime stood out in my mind. After sitting in the living room each evening I usually shut a bunch of lights off downstairs, upstairs I switch on the light to the room so I can turn on my bedside light and then go back out to switch the bedroom light off. I focused on this scenario and started researching online.

I went to the Apple Store page and searched through the HomeKit accessories to get an idea about what products were available. My bedside table lamp is from IKEA so it has the small E14 bulbs, so I had to find a “smart” outlet for that part of my plan. I settled on the iHome iSP5 because it was on sale from Amazon and was shaped so you could still plug other stuff in above or below it. For the downstairs lights I went with a Hue Starter Kit because they were the most well known brand available right now. I went with this particular starter kit, because it included a remote switch so you didn’t need a device to turn on the lights.

The Hue Starter kit was the first thing I received so I quickly unboxed them and replaced the two “dumb” bulbs in the recessed light over the fireplace with the new bulbs. I plugged the Hue Hub into my router and downloaded the Hue app. The setup in the app was pretty easy and was happy to see that signing up for a Hue account was optional. Next I went to the app store to download the Home app because I had removed it from my iPhone. The home app set up was easy, I created a room and was able to group the two lights together so they would be controlled as a single accessory. Controlling the lights from the control center was great and the ability to dim them by using a 3D touch was a neat feature. The Home app was able to dim the bulbs, but unlike the Hue app I wasn’t able to change the shade of white for the bulbs. I am not sure if the API just doesn’t support this yet or if Philips just hasn’t implemented it. Sounds like a software thing so it can easily be corrected.

The last thing to set up was Family Sharing, which started out pretty well. I quickly added my wife and kids to our home and they received the notifications. At some point I received a notification that I needed to set up either an iPad or Apple TV in order to access HomeKit from outside of our home network. I followed the directions for setting it up on the Apple TV, but wasn’t able to see the correct setting show up. On my iPhone I looked for the Home setting that appears on the iPad and couldn’t find it so I tried logging out of iCloud and then logging back in, which caused meant my Photo library had to get reconciled. In the end there isn’t a Home setting on the iPhone and eventually my Home setup propagated to the Apple TV.

I am stilling waiting on the iHome plug, but in the meantime I have been able to play around with Scenes and set it up so I can say “Good Night” to Siri and the lights would turn off. It is taking a bit of getting used to, but so far I haven’t received any complaints from my family about not being able to use the regular switch.

To be continued…

Hue has three different types of standard “shaped” bulbs: Hue White, Hue White Ambiance, and Hue White and Color Ambience. Hue White, the cheapest of the bunch, costs about $15 each, and only supports a single shade of white. The Hue White Ambiance costs about $30 each and supports over 50 thousands shades of white. The Hue White and Color Ambience, costs about $50 each and supports 16 million colors.

My Kingdom for an iPad Local Data Store

Almost a year ago I purchased the 9.7" iPad Pro, because I wanted to start using an iPad for more than just consuming social media and videos. In that time I have used the iPad on a daily basis at work mostly as a notebook by using GoodNotes, OneDrive and the Apple Pencil. Personally I have started blogging more using the ByWord and an old Apple Magic Keyboard. I also pushed the bounds of the device by recording, editing and posting my podcast, Kilobyte, exclusively from my iPad. The latter involved the Apple USB adapter, Ferrite (for recording and editing), DropBox for hosting, Coda for updating the RSS feed and Workflow to join it all together. It has been amazing how much I can accomplish now that I have a basic understanding of importing, exporting and saving using iOS extensions.

One thing noticeably absent from that list is making and editing videos, which seems odd given how easy and natural it is to use the iMovie app for simple videos. It isn’t excluded because I haven’t been making videos, because since August I have posted a bunch of drone videos on my YouTube channel, but they were all made using a Mac. I have avoided using the iMovie for iPad for one reason, video file management difficulties.

My drone footage always ends up on a Micro SD card either from my GoPro camera or the DVR inside my FatShark googles. At this point I can chain together a few dongles (MicroSD adapter to SD Card Reader to Apple’s USB adapter) and get them into the Photos app on my iPad, which will automatically upload them to my iCloud Photo Library. The problem is I don’t want these raw video files in my iCloud Photo Library and more importantly I don’t want my iPad to spend battery or bandwidth uploading over 1GB of data to the internet. Yes internet connections are everywhere, but they aren’t all created equally and sometimes it isn’t polite to just destroy a coffee shop’s internet bandwidth.

All I want is a folder inside an app where I can copy files from the USB drive without having to go through my iCloud Photo Library. I am not asking for an OS level filesystem, just something in an app that won’t get synced to the cloud. My ideal iMovie workflow would let me create a new project, plugin a USB card, select the video files to import (regardless of folder structure) and pull those videos into the app so they are stored locally just like the projects are stored today. After editing the movie and uploading it to YouTube, I could then choose to delete the project file including the imported videos.

If there is ever hope of getting audio and video professionals to switch to the iPad for work it is requires support for enormous file sizes and external disks. The cloud based data providers like iCloud, DropBox and Google Drive just fall down when working on enormous media files. I really enjoying editing podcasts using the Apple Pencil and think it would be just as much fun to edit video, but right now it just doesn’t work for me.

Adopting the iPad Lifestyle

I have been very interested in the ongoing discussion about the iPad-only lifestyle on all my favorite podcasts. It has made me think a lot about how I use my iPad and more importantly how I could be using my iPad for more tasks. A few weeks ago I bought a 9.7" iPad Pro with the intention of taking my iOS game to the next level. It has been an interesting experiment and has required me to rethink my usual workflow at both home and work.

The Dev Diary

The first thing to go was going to be my “Daily Dev Diary”. For the last few years I have been printing out a sheet of paper each day for keeping me on task and for keeping track of little things that happen during the day. Each morning I take my notes from the previous day, update the source document and then create the next day. The document has four sections to cover things I want to do over the long term, things I did yesterday, things I have to do today and random notes.

Migrating this process to include the iPad, was pretty easy once I settled on using Good Notes 4 as the primary note for note taking. I start by editing the master markdown document on my laptop and print the current day out to a PDF using Google Chrome. The PDF resides in OneDrive, which I use for all of my work file needs. I open up Good Notes 4 and import the document using the OneDrive integration. Once in the app I am able to use my Apple Pencil to markup the document as I had before. At the end of the day I export the document back to the OneDrive folder and voila it is ready for the next day. It was weird at first walking around with the iPad, but eventually it became natural and I don’t think I could go back to using the paper.

Secretary’s Day

One of my extracurricular activities involves being the secretary for the local youth baseball league, Merrimac Baseball. Due to my recent success with my dev diary, I thought it would be a piece of cake. I immediately ran into a problem with the first step in the process, duplicating an existing iCloud Drive document. I normally take the previous meeting minutes markdown file and make a copy, but there didn’t seem to be an easy way to do this in iOS. I opened up the iCloud Drive app, but it only provided me with a limited set of options. My markdown editor of choice, Byword recently added support for editing iCloud Drive documents, but I couldn’t figure out how to “Save As” or “Duplicate” the files. In the end I turned to Workflow for iOS and created a custom workflow that would let me select an iCloud Drive file and save it somewhere else. It took a few tries to get it right, but now I have it there to use whenever I need to copy a file. Once I duplicated the file it was all downhill from there, because I just used GoodNotes for my note taking.

After the meeting I had to transcribe my notes back into a markdown file, which I did using the new split screen feature in iOS 9. Byword had some problems displaying the full keyboard in split screen mode so that wasn’t great, but I did eventually figure it out. Finally after exporting the PDF to iCloud Drive I had to upload it to the baseball website. At first I wasn’t sure if it was possible, but once I clicked on the file chooser button on the web page in Safari, I was presented with my iCloud Drive directories and quickly found the PDF and added it to the site.

Learning the Ropes

So far the iPad lifestyle experiment has been successful for me because the device is so portable and I have found my original assumption about it being too much work to do things in iOS was flawed. There are definitely times when I have to put on my thinking cap and figure out the iOS way to do something, but in most cases it involves a simple solution, I will easily be able to apply in the future. I look forward to continuing this trend and expanding the amount of things I can do on this wonderful little device.

Surface Book First Impression

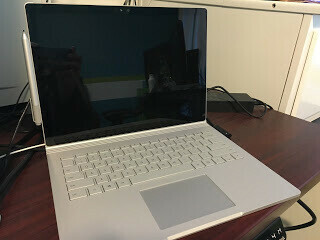
I was over my brother’s house the other day and he plopped his shiny new Microsoft Surface Book down in front of me, pressed the power button and said, “Check this out.” I was very excited to see the hybrid tablet/laptop thing in person ever since the Apple podcast circuit started talking about the viability of living an iPad Pro only lifestyle. People have started taking sides and it has been interesting to see the many different perspectives on the situation. I am still not sure where I stand on the issue, because I split activities across iOS and Mac OS X. Using the Surface Book will give me a chance to see if I might just be better off with a single device that is both (well sort of) or if Apple’s stance on keeping iOS and Mac OS X separate is better.


Bad Start

Right away I was impressed by the screen on the Surface Book, probably because I have never had the pleasure of using a high resolution display on a PC or Mac for that matter. Windows seemed to be taking a really long time to load, so I asked my brother if this thing had an SSD or not. Eventually the Windows splash screen disappeared only to be followed by a Blue Screen of Death, which really looks nice on the display ;-) I held down the power button as I have often done on my work PC and gave Windows another try. It started right up this time and quickly loaded the login screen.

Keyboard Testing

The keyboard was attached so I immediately opened up a web browser and searched for my favorite typing speed test page. I opened up IE and did a search for typing test and just checked out one of the first results. The keyboard felt fine to me and I was able to type at about the same as normal. Most of the time I type on a Microsoft Ergonomic keyboard so any “regular” keyboard hurts my wrists after about a half an hour of typing.

Tablet Mode

I was most excited to try out the stylus and see how that felt on the Surface Book in tablet mode. Based on other reviews I knew there was some sort of software mechanism for detaching the screen so I asked my brother to show me how to do it. Sure enough down in the system tray is an icon for disconnecting the screen. The latch disengaged and I picked the tablet up, it didn’t seem any heavier than an iPad Pro to me. Once in tablet mode the top seemed to be slightly thinner than the bottom, which instinctually made me flip it over and to the lean forward to trigger the accelerometer to flip the display. Nothing happened. I tilted it forward again, because that is an old iOS trick when changing orientation. I shrugged it off and put it down on the table so it was slanted away from me. (Later on I fumbled throught the settings and found the orientation had been locked)

Full Windows in Tablet Mode

Once in tablet mode I had to find OneNote so I could do some drawing using the stylus. I tapped on the start menu and tapped until I found not one, but two OneNote applications. I tapped the first one and it asked me to log in with a Microsoft account, so I closed the window and opened the other one. In the process of navigating around it hit me that something didn’t feel right. I really didn’t like complex desktop type navigation on a tablet. I think the iPad’s giant sized iPhone home screen layout of apps could be improved (not sure how), but it is just so much more natural than drilling down into the Start Menu to look for an app. Yes I could have used search as I often do on my iPad, but this seemed clunky to me. I guess my brain has just been trained to expect a cleaner interface on a tablet device thanks to iOS. Either way it was an interesting moment for me.

The Stylus

Once I opened the correct OneNote I grabbed the stylus and started drawing. The lag when drawing wasn’t noticeable to me and the palm rejection was great. I drew some pictures and practiced zooming and rotating to see what things looked like. Overall it was a great experience. I handed the stylus over to my 9 year old son and he started drawing. He has used a stylus on my iPad Air for drawing before and was being very careful not to touch his palm to the screen. I told him how with this display he could put his hand down and it wouldn’t cause problems, which made him happy. He spent a few minutes drawing and intuitively changed colors, zoomed, panned and erased.

Final Thoughts

Despite the technical difficulties on start up, the SurfaceBook worked pretty well. The computer itself has a nice modern design and the keyboard was fine for me. Using the stylus was great and put to shame the stylus I currently use with my iPad Air. The process of detaching and attaching the tablet to the keyboard was kind of weird, but I guess since the GPU lives in the main body you probably don’t want to just pull it apart. My biggest take away from the whole experience was my dislike for the desktop interface when in tablet mode. It just didn’t feel right and seemed like way too much overhead for when you are just doing something as simple as tapping on the screen with your finger. The iPad home screen needs work, but in its current state beats using the Start menu every time. Of course I only used the tablet for about 15 minutes, so I am sure there are things that become natural over time, but I do use Windows almost 8 hours every day so its not totally foreign to me. I will consider to ponder the viability of the iPad lifestyle, but for now the only thing I know for sure is that keeping iOS and Mac OS X separate seems like a good long term bet, if only so the simple iOS interface doesn’t become polluted with the sins of our desktop past.

Tips for iOS Device Enjoyment

Here is a list of the first things I do when I get a hold of somebody’s iPhone or iPad when they are looking for advice on how to set up their iOS devices.  After completing the following you should have a better experience with your iOS device.


  1. Upgrade to a paid iCloud storage plan.

    The free 5GB storage option is nice when you get started, but after you have lots of photos on your phone OR have two devices this space runs out quickly and will give you the dreaded “Unable to back up your device because you don’t have enough iCloud storage.”  Apple recently revised their storage tier pricing so you can get 50GB of storage for $0.99 per month (less than $12 per year).  This space can be used to store all sorts of things, but most people will use it for the back up of their devices and for their photos.

    To upgrade your storage plan just do the following:
    - Go to the Settings app
    - Navigate to the iCloud settings
    - Tap “Storage” setting
    - Tap “Change Storage Plan”
    - Tap the storage plan of your choice and tap Buy
    - You will be prompted to enter your iTunes password and will then be billed monthly.
  2. Turn on iCloud Photo Library

    One of the biggest culprits of the “Not enough space available” message is Photos and typically you see this message when trying to take a photo.  The gut response is to go to the Photos app and start deleting photos to make space, which will most likely cause you to make hurried and rash decisions.  You may find that when you have more time you will take the photos off of your device and put them on a computer, which works for a time, but then you don’t have access to them on your phone anymore.  The iCloud Photo Library will put a copy of all the photos on your device onto Apple’s servers.  The photos will take up your iCloud storage space, but if you completed step 1 above then you will be able to store plenty of photos.  The added bonus is you can see all the photos on any iOS devices you are logged into and will also be able to view them at iCloud.com.  Your “Not enough space available” issue will also be resolved, because as your device starts to run low on space, the device will start to clean up any of the full versions of the photos that are on the device that are also on Apple’s servers.  You will always have small versions (thumbnails) of your photos on your devices, but no matter what the full version will always exist in the server, only to be downloaded to your device if you try to view it.

    How to enable iCloud Photo Library
    - Go to the Settings app
    - Navigate to the iCloud settings
    - Tap the Photos item
    - Flip the switch to turn on the “iCloud Photo Library”
    - Choose “Optimize iPhone Storage” if you have a small phone and lots of photos.
    - It will take a while for it to upload all your photos.  Go to iCloud.com and you can see how it is progressing
  3. Turn on iCloud backup

    One of the most common features that people typically have turned off is the iCloud backup.  I often talk about this by saying, “I could take my phone and throw it into a river right now, go to an Apple store, buy a new phone and within minutes be up and running with everything exactly the same.”  Now of course that is a doomsday scenario, but this comes in handy when you get a new phone, because the first thing it asks you is whether or not you want to restore from an iCloud back up.

    How to enable iCloud Backup
    - Go to the Settings app
    - Navigate to the iCloud settings
    - Tap the Backup item
    - Turn on the back up
  4. Change the name of your device
    I would always get confused in the past when looking at a list of my devices somewhere either in the Find my iPhone app or with back ups regarding which actual device it was talking about.  I used to just say “Keegan’s iPhone”.  Starting with my iPhone 5, I actually went in and updated the name to “Keegan’s iPhone 5” so if I updated to the iPhone 6S I would know exactly which phone it was talking about.

    How to update your device name
    - Go to the Settings app
    - Navigate to General > About
    - Tap the Name field and update your device name to the actual model number.

The Mystery of iCloud Photo Library Optimization

To say I was thrilled with the introduction of the iCloud Photo Library is an understatement.    I have been waiting for this type of single source library for years.  Of course I immediately turned it on for all  my devices and went all in (not completely in Photos for OS X, because my library was all referenced and it is a slow process moving them over).  I was also excited about the cool Optimize Storage option in iOS because in 2012, when I bought my iPhone 5, 16GB seemed like plenty of space.  

However, as I soon found out the Optimize Storage option would cause me more stress than I anticipated.  You see Apple decided that the optimization would be completely automatic with no opportunity for manual intervention for the user.  There is clearly some sort of algorithm that determines what full size versions of photos to keep on the device.  So far one of the rules revolves around photos taken within the last 30 days and there is also one based on photos that were downloaded locally to the device in the recent past.  It seems that no matter how low the available storage level goes the full size of these photos will remain on the device.  

I learned this because the other day I tried to take a video of my son playing baseball and got the dreaded “Video couldn’t be saved because of insufficient space” message. My heart sunk because I thought barring some insane offline photo taking spree this error would never appear on my devices again.  My expectation was that in the worst case scenario if space was running low (as in I didn’t have enough space to take one picture) that the “Optimize” setting would delete ANY photos that had already been uploaded to the cloud.  I figured maybe there were tiers:
if (availableStorage > 500MB) then don’t do any optimization
if (available Storage < 500MB && availableStorage > 250 MB) then get rid of any full size copies of photos from more than 30 days ago that have been uploaded to the cloud
if (availableStorage < 250MB) then delete any full size photos that have been uploaded to the cloud

No such luck though, it seems to insist on keeping some amount of full size photos on the device even if they exist in the cloud.  I was bit by this recently because about 2 weeks ago I went on a trip and recorded a bunch of video, which went up to the cloud nearly the same day.  However, now the 1GB of videos from last month sits on my device and I have no way of deleting it without also deleting the copy in the cloud too.

I tried all sorts of trickery like trying to delete the photos using the Image Capture app on my MacBook.  I turns out the delete functionality isn’t available if iCloud Photo Library is turned on for the device.  So I tried turning off the iCloud Photo Library on the phone and while the delete button appeared in Image Capture it didn’t really do anything.

In the end I found the best way to get me back some space was to turn off the iCloud Photo Library on my iPhone, which freed up some space because it removed all the iCloud Photo Library thumbnail photos, but all the full size photos were still on the device.  At this point I was able to use the Photos app on my iPhone to remove photos and videos from my device, but not from the iCloud Photo Library. I also had to delete them from the “Recently Deleted” album too. Once I got rid of some of the videos that had been taking up so much space I turned the iCloud Photo Library back on and it started downloading the thumbnails again, but I now have a 1.5 more GB of free space on my iPhone. 

iOS 4 on the iPhone 3G Update

Last week I posted an entry about the slowness of my iPhone 3G after updating to iOS 4.  As with most slowness I was starting to get used to it so it didn’t seem so slow, but of course every once in a while I was reminded with an extended wait for a specific app.  So…. last night I decided to attempt a clean restore of iOS 4 to see if the situation improved.  It took about 15 minutes to restore the phone to iOS 4 and then over an hour to reload it from a back up.  Apple really needs to find a way to make syncing between an iPhone and iTunes faster, because it is sooooo slow.  Everybody seems to want over-the-air syncing, but I can’t imagine how this would be faster even if slightly more convenient.  Okay enough about syncing, once all was said and done I unplugged the iPhone and tested it out and it was a bit snappier.  Again this morning I used it and I saw some more improvements in performance, but typically performance seemed better after a fresh restart so I am going to hold my final judgement until later in the day.

To iOS4 or Not To iOS4

A couple weeks ago I upgraded my iPhone 3G to the brand spanking new iOS4.  Of course the feature set gained by this is dramatically smaller than the full bevy of features on the iPhone 3GS or iPhone 4. I was mostly interested in folders, multiple exchange servers and also a unified inbox, so I decided to take the leap and boy have I paid for it.  The phone is nearly unusable now, think of it as running Windows 7 on a Windows 95 era machine.  What formerly was called the “Best iPod Ever”, can barely even launch the iPod app in less than 15 seconds and once it is launched good luck getting it to not crash.  The Maps app opens and then locks up for several seconds before you can actually pan and zoom. Of course there is a short term solution for the problem which involves restarting the phone a couple times a day.

This would all be okay if I could actually find a store with the iPhone 4 in stock, but who knows when I will be able to find one.  I am now left with the decision of dealing with this slowness and leveraging the iPad as often as possible OR following some undocumented steps to revert my phone to iPhone 3.1.1.  Are the few features I get with the iOS 4 worth the trouble?  At the current time I am leaning towards NO and will probably do the downgrade soon.  If anybody else is having a similar problem here is a site with the Steps to Downgrade an iPhone’s firmware.